How to Repair a Laptop Charger Cable at Home (2025 Guide)
Laptop chargers are necessary to keep your device working, but with time, the cables can get frayed, bent, or broken. You can save money and fix the cable yourself instead of buying a new charger. This post will show you how to fix a laptop charger cord at home so that it works again.
Why Repair Your Laptop Charger Cable?
Before diving into the repair process, it's essential to understand why repairing a charger cable can be a good option:
- Cost-effective: Replacing a laptop charger can be expensive. Repairing it can save you money.
- Environmental impact: Fixing a cable instead of throwing it away reduces electronic waste.
- Quick solution: If you're in a hurry, repairing your charger can be a quick fix to get back to work or study.
Step 1: Identify the Problem with the Charger Cable
Before you start repairing, it's essential to pinpoint the issue. A damaged charger cable can cause intermittent charging, no charging, or overheating.
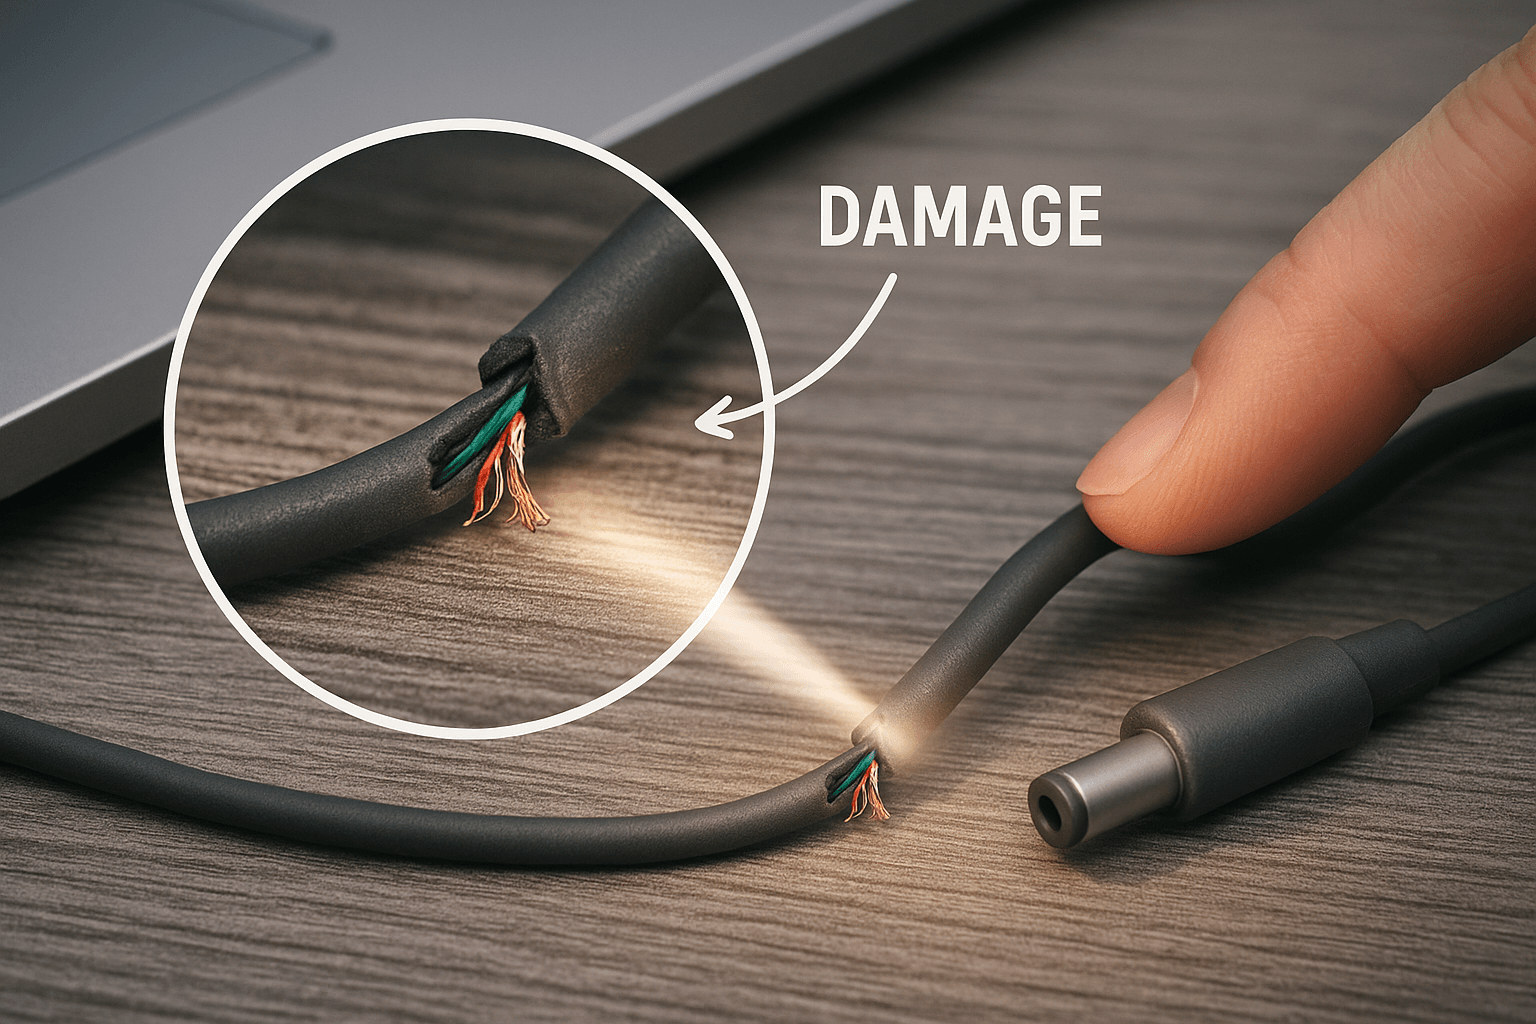
- Loose connection: Sometimes the cable might have a loose connection near the plug or the cable.
- Frayed wires: If the cable is visibly damaged, it's essential to check for any exposed wires.
- Not charging: A complete failure to charge can indicate an internal break or a faulty connection.
To inspect your cable:
- Plug in the charger and move the cable near the plug. If the charging indicator turns on or off based on movement, you may have a loose connection or a damaged wire.
You'll need a few basic tools to repair the charger cable:
- Electrical tape or heat shrink tubing: These will help insulate the repaired area and prevent further damage.
- Wire cutter/stripper: To cut and expose the wire when necessary.
- A soldering iron and solder are needed if the wires are damaged and need to be connected again.
- Multimeter (optional): For testing the continuity of the cable and ensuring it's adequately repaired.
Step 3: Turn Off the Power and Inspect the Charger
Ensure that the charger is unplugged from both the laptop and the power outlet before starting any repair work. Working on live electrical connections can be dangerous.
Inspect the entire length of the cable. If you notice fraying near the plug, it's usually where the damage is. You might also find areas where the outer layer of the cable is intact, but the wires inside are exposed.
Step 4: Repair Frayed or Exposed Wires
If the cable is frayed or has exposed wires, it's essential to fix them properly to prevent any potential electrical hazards.
Option 1: Using Electrical Tape
- Strip the cable carefully: Use the wire stripper to carefully remove the outer coating of the wire in the damaged area.
- Secure the wire: Once the wires are exposed, wrap the damaged section tightly with electrical tape. Make sure the individual cables inside do not touch each other.
- Reinforce the tape: Add another layer of tape to ensure that it is securely wrapped and insulated.

Option 2: Using Soldering (For Advanced Repair)
- Cut and strip the wires: If the cable is completely severed, cut it and strip back the insulation on both ends of the wires.
- Solder the wires: Use the soldering iron to connect the cables properly. Be sure to heat and melt the solder to create a solid connection.
- Insulate with tape or heat shrink tubing: Once the wires are connected, wrap the area with electrical tape or place heat shrink tubing over the soldered joint and heat it to seal the connection.
Step 5: Test the Charger
After repairing the cable, it's time to test whether the repair worked.
- Plug the charger into your laptop and the power outlet.
- Check if the charging indicator light turns on.
- Try moving the cable in the repaired area to see if the connection is stable.
If the charger works, congratulations! You've successfully repaired your laptop charger cable.
Step 6: Reinforce the Repair
To prevent further damage in the future, you can reinforce the repair with additional protection.
- Wrap the repaired area with more electrical tape or add a layer of heat shrink tubing to make sure the cable is protected.
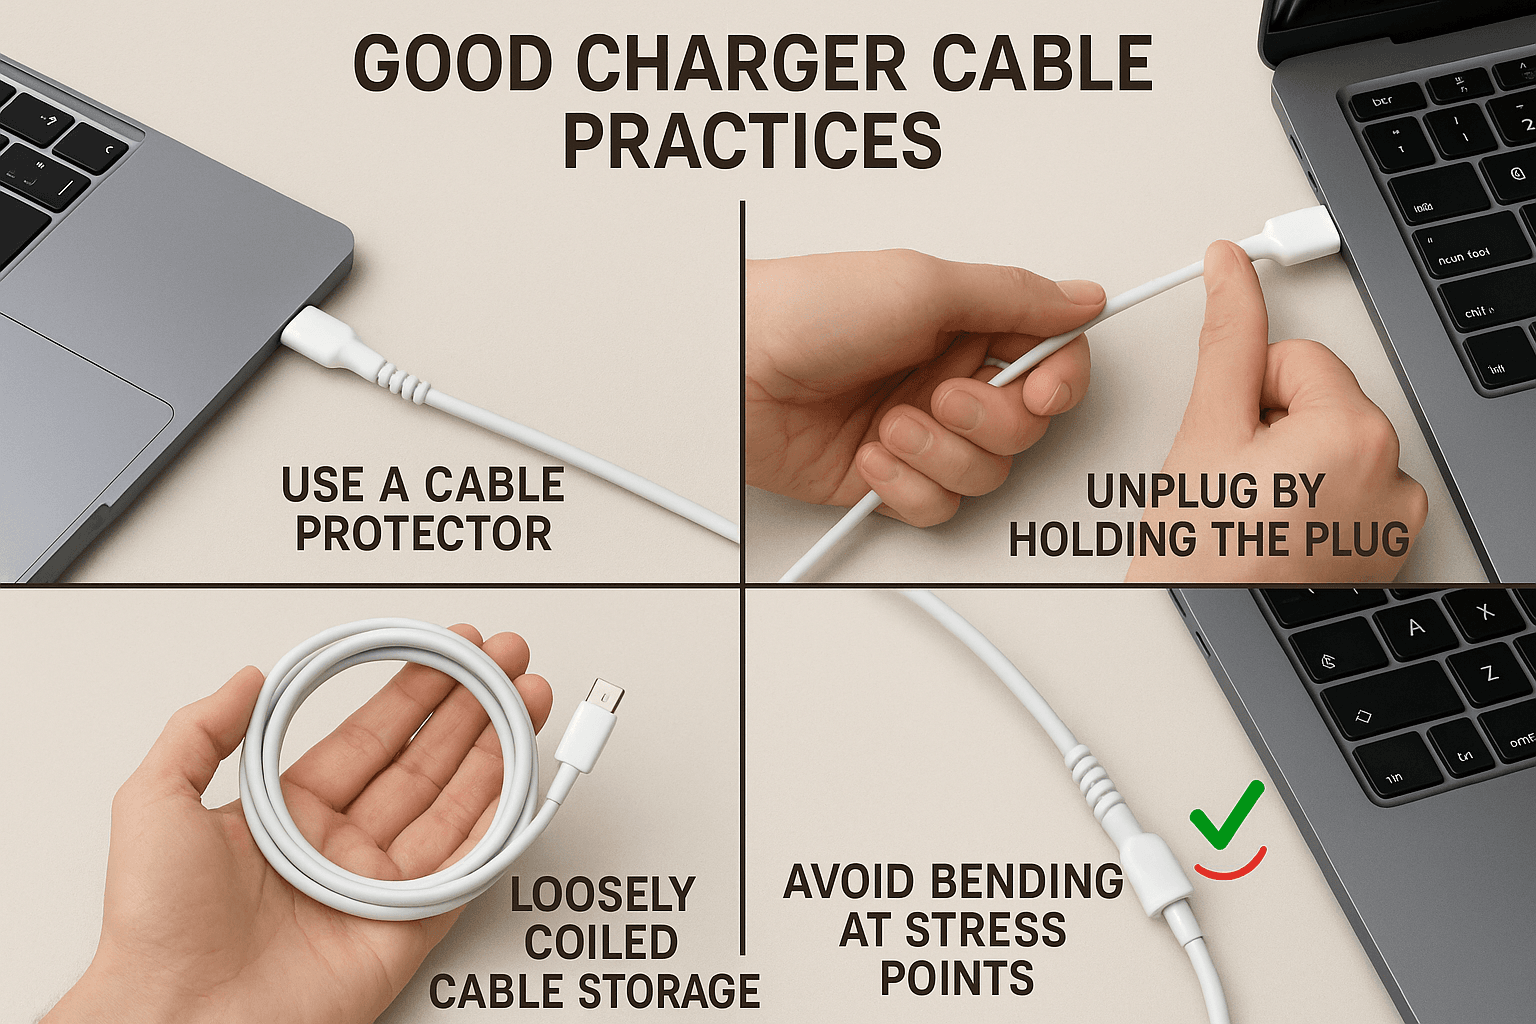
- Use a cable protector: Consider adding a small cable protector to the area near the plug where cables tend to bend and break.
Pro Tips for Maintaining Your Laptop Charger
- Avoid bending: Try not to bend your charger cable at sharp angles. This is one of the most common causes of damage.
- Store it properly: Roll your charger carefully and store it in a safe place to avoid unnecessary wear and tear.
- Use a cable organizer: Keeping your cables organized and untangled will prolong their life.
Conclusion
Repairing a laptop charger cable at home is an easy and cost-effective solution to extend the life of your charger. With the right tools and a bit of patience, you can avoid spending money on a new charger and keep your current one functioning. Just remember to exercise caution, especially when working with live electrical components.
FAQs
Can I repair my laptop charger without a soldering iron?
Yes, you can use electrical tape to secure the wires, but soldering provides a more reliable and long-lasting connection.
Is it safe to repair a laptop charger cable?
As long as you follow proper safety precautions and use the right materials, it is safe to repair your charger cable.
Can I use any tape to repair the cable?
It's best to use electrical tape, as it is specifically designed for insulation and protection of electrical wires.
How long will a repaired charger last?
A well-repaired charger can last a long time, but it will depend on the quality of the repair and how well you take care of it.
What if the charger is beyond repair?
If the charger is heavily damaged or completely broken, it's best to replace it rather than risk further electrical issues.
If you want to sell your old devices, then click here.


